Manual pellet stoves offer an efficient and eco-friendly heating solution for homes, transforming old fireplaces into modern heat sources. They represent a significant upgrade!
What is a Manual Pellet Stove?
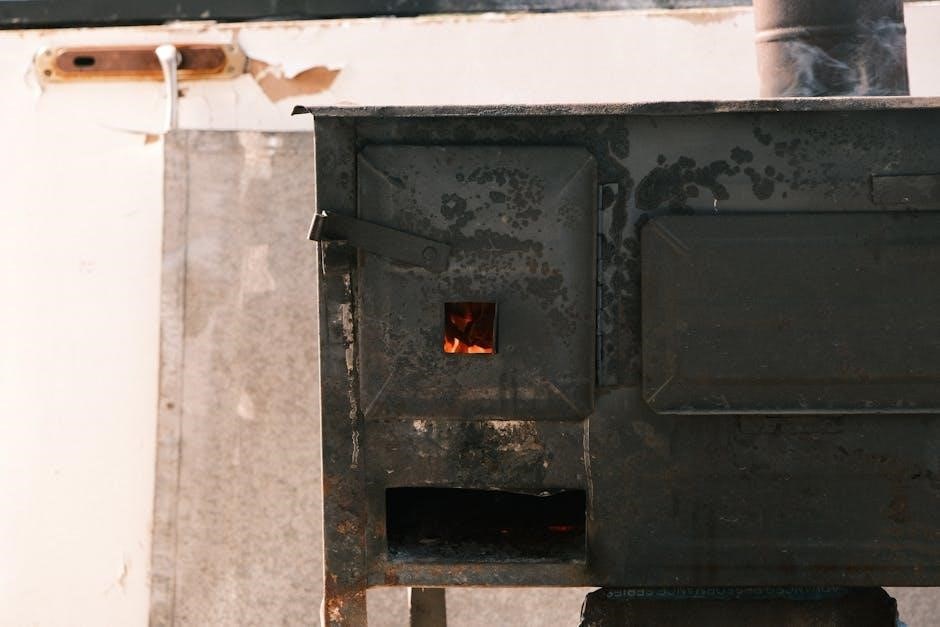
A manual pellet stove is a non-certified heating appliance designed to burn compressed wood or biomass pellets to create heat. Unlike automatic pellet stoves, manual models require the user to manually feed pellets into the burn pot and control the burn rate. This hands-on approach offers a more traditional heating experience, providing warmth without relying on electronic components or complex systems.
These stoves typically feature a cast iron burn pot where combustion occurs, and a flame guide positioned above to ensure efficient burning. They are often installed as freestanding units or inserted into existing fireplaces, offering a versatile heating solution. Manual pellet stoves are known for their simplicity, affordability, and ability to provide substantial heat, making them a popular choice for supplemental or primary heating in various climates.
Benefits of Using a Manual Pellet Stove
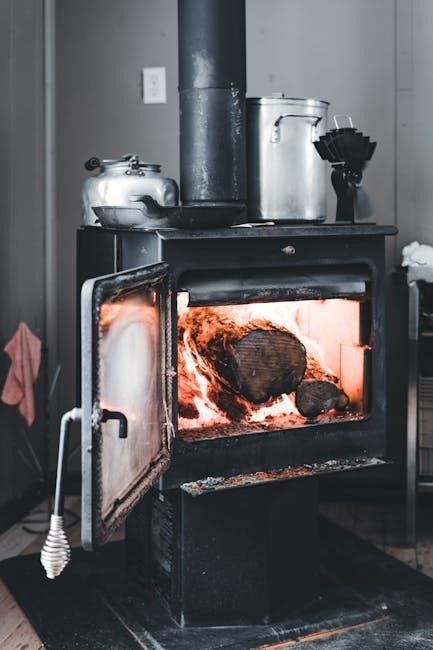
Manual pellet stoves present numerous advantages for homeowners seeking efficient and cost-effective heating. They are an environmentally friendly alternative to traditional wood stoves, utilizing renewable fuel sources – wood pellets – which reduce reliance on fossil fuels. These stoves boast high efficiency rates, converting a significant portion of the fuel’s energy into heat, lowering heating bills.
Furthermore, manual pellet stoves offer a clean-burning experience, producing minimal smoke and ash compared to conventional wood-burning appliances. Their simple design translates to lower maintenance requirements and reduced risk of mechanical failures. They are also versatile, suitable for heating small to medium-sized spaces, and can be easily integrated into existing fireplaces, enhancing home value and comfort.

Planning Your Installation
Careful planning is crucial for a successful manual pellet stove installation, encompassing local regulations, proper sizing, and gathering necessary tools for a safe setup.
Local Codes and Permits
Before beginning any pellet stove installation, thoroughly investigate local building codes and permit requirements. These regulations vary significantly by location and are designed to ensure safety and proper installation practices. Contact your local building department to determine specific requirements for pellet stove installations in your area.
Permits often cover venting systems, clearances to combustible materials, and electrical connections. Failing to obtain necessary permits can result in fines and require costly rework. WETT inspections are often required in areas like Barrie, Orillia, and Midland, ensuring compliance with safety standards. Adhering to these codes protects your home and family, guaranteeing a safe and efficient heating system. Ignoring these steps could void insurance coverage.
Choosing the Right Size Pellet Stove
Selecting the appropriate size pellet stove is crucial for efficient and comfortable heating. Consider the square footage of the space you intend to heat, as well as insulation levels and climate conditions. A stove that’s too small won’t adequately heat the area, while one that’s too large will cycle on and off frequently, reducing efficiency.
Pellet stove BTU (British Thermal Unit) output is a key factor. Generally, you’ll need approximately 20 BTU per square foot. However, colder climates or poorly insulated homes may require more. Consult with a qualified dealer to determine the optimal BTU output for your specific needs. Remember, pellet stoves are best suited for heating small to medium-sized spaces effectively.
Necessary Tools and Materials
Successful pellet stove installation demands having the right tools and materials readily available. Essential tools include a stud finder, drill with various bits, measuring tape, level, and a metal-cutting saw or hole saw for vent pipe installation. Safety gear like gloves and eye protection are also vital.
Required materials encompass the pellet stove itself, venting pipe (specifically designed for pellet stoves), a vent cap, wall thimble, wall plate, and silicone sealant. You’ll also need electrical wiring and connectors for the stove’s power supply. Don’t forget the cast iron flame guide, crucial for proper burn pot function, and appropriate fasteners for secure mounting.
Installation Process: Step-by-Step
Begin by preparing the installation area, then install the venting system, mount the stove, connect the vent, and finally, complete the electrical connection safely.
Preparing the Installation Area
Before beginning, thoroughly assess the designated space for your manual pellet stove. Ensure the floor is level and constructed of a non-combustible material, like tile or concrete. If installing on a combustible floor, a protective hearth pad is absolutely essential for safety.
Remove any flammable materials from the immediate vicinity of the stove, adhering to the manufacturer’s specified clearance requirements. This includes curtains, furniture, and paper products. Carefully inspect the existing fireplace, if applicable, for structural integrity and clean out any accumulated ash or debris.
Plan the vent pipe route, considering the shortest and most direct path to the outside while complying with local codes. Prepare the wall for the vent pipe thimble installation, ensuring a secure and airtight seal. Proper preparation is key to a safe and efficient installation.
Installing the Venting System
Proper venting is crucial for safe and efficient operation of your manual pellet stove. Begin by installing the vent pipe thimble through the wall, ensuring a secure and airtight fit. Carefully connect sections of venting pipe, using the appropriate hardware and sealant as recommended by the manufacturer.
Maintain a consistent slope upwards towards the exterior vent cap to facilitate proper draft. Avoid sharp bends or excessive horizontal runs, as these can impede exhaust flow. Securely fasten the vent pipe to the stove and wall supports, preventing movement or vibration.
Finally, install the exterior vent cap, ensuring it’s protected from weather elements and debris. Most pellet vent pipe requires specific installation techniques.
Venting Pipe Configuration (Straight Out the Back)
A straightforward configuration involves directing the venting pipe directly out the back of the pellet stove and through an exterior wall. This method is often the simplest and most efficient, provided it meets local code requirements. Ensure a minimum of 10 to 12 inches of vent pipe extends past the outside wall to prevent backdrafting and ensure proper exhaust dispersal.
This configuration is particularly suitable for installations where the stove is positioned close to an exterior wall. Maintain a consistent upward slope throughout the vent run, avoiding any downward angles that could cause condensation or impede airflow.
Securely support the vent pipe to prevent sagging or movement, and always use approved venting components.
Venting Pipe Altitude Considerations (Below 3000 ft)
For installations at altitudes below 3000 feet, standard venting practices generally suffice for manual pellet stoves. However, proper venting remains crucial for safe and efficient operation. Ensure the venting system is correctly sized and installed according to the manufacturer’s instructions and local building codes.
Adequate draft is essential to expel combustion gases effectively. A straight-out-the-back configuration, with the recommended 10-12 inch extension past the exterior wall, typically provides sufficient draft at lower elevations.
Regular inspections of the venting system are vital to identify any obstructions or damage that could compromise performance; Maintaining a clear vent path ensures optimal combustion and prevents carbon monoxide buildup.
Mounting the Stove and Connecting the Vent
Carefully position the pellet stove onto the prepared wall plate, ensuring it’s level and stable. Secure it according to the manufacturer’s guidelines – this often involves lag bolts or similar fasteners. Precise alignment is key for a safe and effective installation.
Next, meticulously connect the vent pipe to the stove’s exhaust outlet. Use the appropriate adapter and ensure a tight, secure seal to prevent leaks. Extend the vent through the thimble installed in the fireplace or wall, and continue to the exterior;
Double-check all connections for airtightness. A properly connected vent is paramount for safe operation and efficient exhaust of combustion gases.
Installing the Flame Guide
The flame guide is a crucial component, directing the flow of combustion air and ensuring efficient burning of the pellets. It’s typically made of cast iron and sits directly above the burn pot within the stove.
Carefully position the flame guide on top of the burn pot. Ensure it’s fully seated on the vertical sides, creating a snug fit. The back of the guide should rest firmly against the rear of the burn pot, preventing any gaps or misalignment.
Proper installation is vital for optimal performance. A correctly positioned flame guide promotes complete combustion, minimizes smoke, and maximizes heat output. Refer to the manufacturer’s instructions for specific details regarding your model.
Electrical Connection
Most pellet stoves require a dedicated 120V electrical connection, similar to a standard household outlet. This powers the auger, fans, and control board – essential for operation. Never connect the stove to an extension cord or multi-outlet strip.
Before connecting, ensure the stove is unplugged and the circuit breaker is switched off. A qualified electrician should ideally handle this step, verifying proper grounding and circuit capacity. Incorrect wiring can pose a serious fire hazard.
Connect the stove’s power cord directly to a grounded outlet. Once connected, turn on the circuit breaker and then plug in the stove. Verify the control panel illuminates, indicating a successful connection.

Safety Considerations
Prioritize safety with pellet stoves by installing carbon monoxide detectors and ensuring proper ventilation, alongside adhering to strict clearance requirements for safe operation.
Carbon Monoxide Detectors
Crucially, install carbon monoxide (CO) detectors near the pellet stove and in sleeping areas. Pellet stoves, while generally safe, produce combustion byproducts, and CO is a colorless, odorless, and potentially fatal gas. Regularly test these detectors to ensure they are functioning correctly, replacing batteries as needed.
A properly installed and maintained CO detector provides an essential layer of protection for your family. Choose detectors that meet current safety standards and are specifically designed for residential use. Never ignore a CO alarm; evacuate the premises immediately and contact emergency services. Understanding the risks and taking preventative measures is paramount when utilizing a manual pellet stove for home heating. Prioritize safety above all else!
Proper Ventilation
Ensuring adequate ventilation is vital when operating a manual pellet stove. While pellet stoves are sealed-combustion appliances, proper airflow is still necessary for optimal performance and safety. The venting system, installed according to manufacturer’s instructions, is the primary means of exhaust removal.
Confirm the venting pipe configuration allows for efficient expulsion of combustion gases, particularly a straight-out-the-back setup with sufficient protrusion. Avoid obstructions within the vent pipe. Regularly inspect the venting system for any blockages or damage. Good ventilation minimizes the risk of backdrafting and ensures a clean burn, contributing to a healthier indoor environment. Prioritize a well-maintained venting system for safe and efficient operation.
Clearance Requirements
Maintaining proper clearances around your manual pellet stove is crucial for fire safety. Consult the stove’s installation manual for specific requirements, as these vary by model. Generally, combustible materials like wood framing, furniture, and curtains must be kept a safe distance from the stove’s surfaces and venting system.
Pay close attention to clearances to walls, floors, and ceilings. Insufficient space can lead to overheating and potentially ignite nearby materials. Protect combustible surfaces with heat shields if necessary. Adhering to these guidelines minimizes fire hazards and ensures the safe operation of your pellet stove. Always prioritize safety by respecting the manufacturer’s recommended clearances.
Post-Installation Checks
After installation, thoroughly test the stove and perform an initial burn-in procedure to ensure proper function and optimal heating performance.
Testing the Stove
Initial testing is crucial after a manual pellet stove installation. Begin by verifying the electrical connection; ensure the stove powers on and the auger initiates pellet feed. Observe the initial ignition – a consistent flame within a reasonable timeframe is vital.
Monitor the stove through several heating cycles, checking for proper pellet feed, consistent flame quality, and adequate heat output. Pay close attention to the venting system for any signs of leakage or improper draft.
Confirm that all safety features, such as overheat protection, are functioning correctly. A carbon monoxide detector should be actively monitored during this phase. Document any anomalies observed during testing for potential troubleshooting or adjustments. A successful test confirms a safe and efficient heating system.
Initial Burn-In Procedure
The initial burn-in for a manual pellet stove is a vital step, typically involving several low-heat cycles. This process allows the internal components to properly seat and cure, minimizing potential odors and maximizing efficiency.
Start with a low heat setting and operate the stove for 24-48 hours, gradually increasing the heat over subsequent cycles. Monitor for any unusual smells, which are common during the initial burn-in as manufacturing residues are eliminated.
Ensure adequate ventilation during this period. Avoid prolonged high-heat operation initially. This gradual process stabilizes the stove, optimizes performance, and prepares it for consistent, reliable heating throughout the season. Regular pellet refills are expected during this phase.

Maintenance and Troubleshooting
Regular cleaning and addressing common issues are crucial for optimal performance of your manual pellet stove, ensuring efficient and safe operation throughout the heating season.
Regular Cleaning Schedule
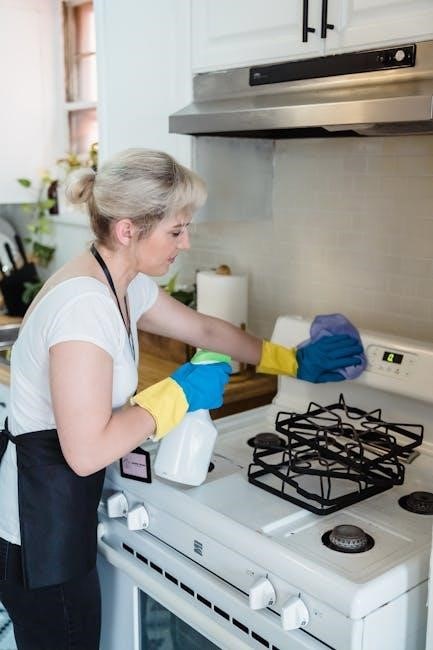
Maintaining a consistent cleaning schedule is paramount for the longevity and efficiency of your manual pellet stove. Daily attention should be given to emptying the ash pan; allowing ash to accumulate hinders airflow and reduces heating performance.
Weekly, inspect the burn pot and remove any clinker or unburnt pellets. A monthly deep clean involves thoroughly vacuuming the firebox, removing any stray pellets or debris. Don’t forget to inspect and clean the venting system – at least annually – to prevent blockages and ensure proper exhaust.
Before each heating season, a professional inspection of all components is highly recommended. This proactive approach ensures safe operation and maximizes the stove’s heating capabilities, contributing to a warmer and more comfortable home environment.
Common Issues and Solutions
Pellet stoves, while reliable, can encounter occasional issues. One frequent problem is inconsistent pellet feed, often caused by moisture-laden pellets or a clogged auger – ensure dry pellet storage and clear the auger.
Another common concern is low heat output, potentially stemming from ash buildup or a malfunctioning blower fan; regular cleaning and fan inspection are crucial. If the stove isn’t igniting, check the igniter and ensure proper pellet delivery.
Smoke entering the room indicates venting issues – inspect for blockages or leaks. Always consult the owner’s manual for specific troubleshooting steps and, if unsure, contact a qualified technician for assistance; Prioritizing safety and prompt resolution is key.
Advanced Considerations
Converting fireplaces or choosing between wall-mounted and freestanding pellet stoves requires careful planning and assessment of your home’s heating needs and space.
Converting a Fireplace to Pellet Stove Use
Transforming an existing fireplace into a functional space for a pellet stove is a popular and efficient upgrade. This process often involves removing existing components like gas lines or wood-burning inserts, ensuring a clean slate for installation.
A crucial step is properly sealing the chimney flue to prevent drafts when the pellet stove isn’t in operation. Installing a thimble through the fireplace surround and exterior siding is necessary for venting. Securely attaching the vent cap completes the exterior work.
Remember to consider the fireplace’s structural integrity and ensure it can support the weight of the pellet stove. Careful planning and adherence to safety guidelines are paramount for a successful conversion, maximizing heating efficiency and minimizing potential hazards.
Wall-Mounted vs. Freestanding Options
Pellet stoves come in two primary configurations: wall-mounted and freestanding. Freestanding models offer flexibility in placement, requiring only a proper floor surface and venting connection. They are ideal for rooms without existing fireplaces or where a mobile heating solution is desired.
Wall-mounted options, conversely, are secured directly to a wall, often utilizing a wall plate for stability. This can save floor space and create a more streamlined aesthetic. Installation typically involves more complex venting procedures, potentially requiring modifications to the exterior wall.
The choice depends on your home’s layout, aesthetic preferences, and installation capabilities. Both types deliver efficient heat, but consider space constraints and venting feasibility when making your decision.